This article has been removed.
The content of this blog can be searched by keyword.
Use the search window in the sidebar or at the top. Alternatively, please translate the original article using Google or other means.
Please find alternative content.
Remnants of articles that had been published (Click!)
Windows 7 /8.1 /10 is bundled with the Microsoft genuine screen capture software Snipping Tool.
And
If you update to Windows 10 v1809 (October 2018 Update) or later, the advanced version of Snipping Tool "Snip & Sketch" will be added.
"Snip & Sketch" (English name: Snip & Sketch)
Therefore,
You don't need to install screen capture software such as WinShot.
It doesn't have the ability to click on the notification area icon to do a screen capture like WinShot does, but there are keyboard shortcuts available instead.
- Free-form region clipping
- Cut a rectangular area
- Cut window area
- Cut full screen area
- Delayed capture (Windows 10 Snipping Tool | "Snip & Sketch")
- Trimming ("Snip & Sketch" only)
- Character addition
- ... etc
Quiet talk suspension.
I have investigated the Snipping Tool and the "Cut & Sketch" capture function and will share it with you.
- Snipping Tool (Windows 7)
- Snipping Tool (Windows 10 v1909)
- Snip & Sketch (Windows 10 v1909)
Function comparison
There is almost no difference ...
If you need lazy capture, you need a Snipping Tool other than Windows 7.
"Snip & Sketch" has a keyboard shortcut that launches in capture mode.
| function | Snip & sketch | Snipping Tool Win10 v1909 | Snipping Tool Windows 7 |
| Free-form region clipping | ○ | ○ | ○ |
| Cut a rectangular area | ○ | ○ | ○ |
| Cut window area | ○ | ○ | ○ |
| Cut full screen area | ○ | ○ | ○ |
| Lazy capture | ○ | ○ | × |
| trimming | ○ | × | × |
| Character addition | ○ | ○ | ○ |
| Keyboard shortcuts (Function selection) | ○ | ○ | ○ |
| Keyboard shortcuts (Start capture mode) | ○ | × | × |
Windows 10 and Windows 7 menu structure
The menu structure of Snipping Tool differs depending on the OS version.
| menu | Win10 | Win7 | Remark |
| Create New | 〇 | 〇 | |
| mode | 〇 | × | Win7 mode selection is in the new menu |
| delay | 〇 | × | |
| Cancel | 〇 | 〇 | |
| option | 〇 | 〇 |
Menu description
The description is based on the Windows 10 v1909 Snipping Tool.
Windows 7 screens are posted as needed.
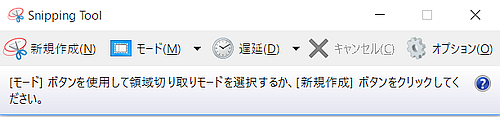
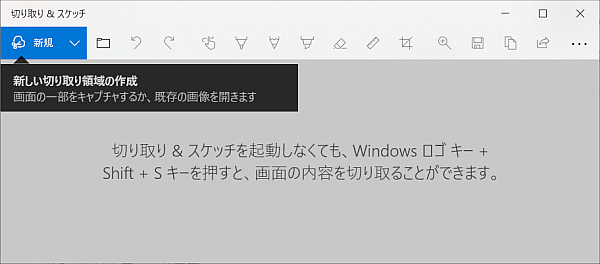
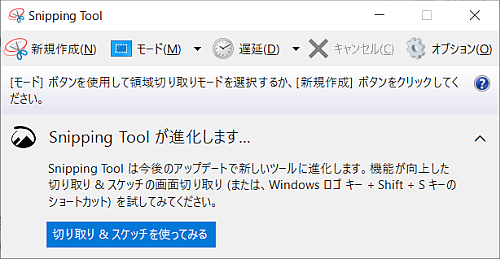
Create New
This menu is used to select a new area cut.
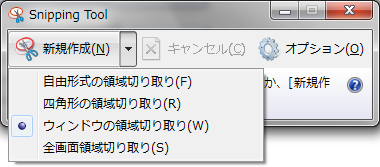
mode
You can select the area cutting mode.
The Windows 7 mode selection menu is in the drop-down list in the New menu.
| Cut mode | Explanation |
| Free-form region clipping | Draw an irregular line around the object |
| Cut a rectangular area | Draw a rectangle by dragging the cursor around the object |
| Cut window area | Select a window to capture, such as a browser window or dialog box |
| Cut full screen area | Capture the entire screen |
  | |
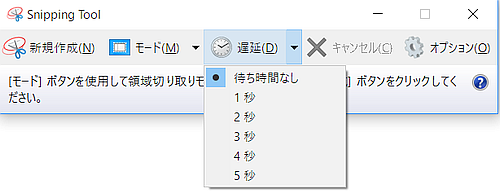
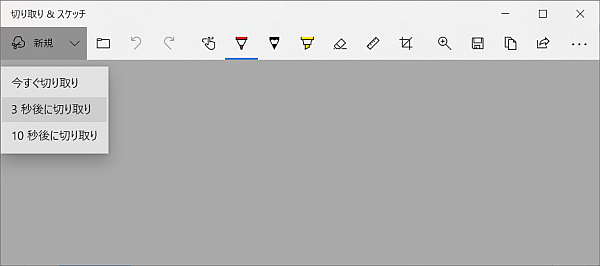
delay
* Windows 10 only
Windows 10 v1809 and later versions can use "lazy capture".
Delayed capture is a function that delays the timing of taking a snapshot between 1 and 5 seconds.
This is a useful function when you want to capture a dialog such as a drop-down list that takes more than two steps.
Cancel
Cancel the area cutting.
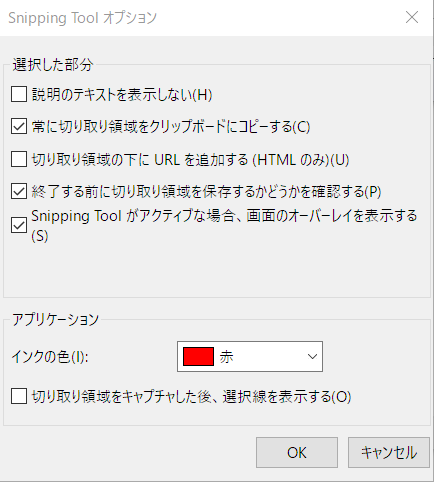
option
☑ Check box to switch ON /OFF
- Do not show description text
- Always copy the crop area to the clipboard
- Add URL below crop area (HTML only)
- Ask if you want to save the crop area before exiting
- Snipping Tool Show screen overlay when active
- Ink color
- Show selection line after capturing crop area
Snip & sketch
How to use "Snip & Sketch"
- Start menu
- Keyboard shortcut
Windows logo key + Shift + S
[Cut Now | Cut in 3 seconds | Cut in 10 seconds]
[Immediately after startup]
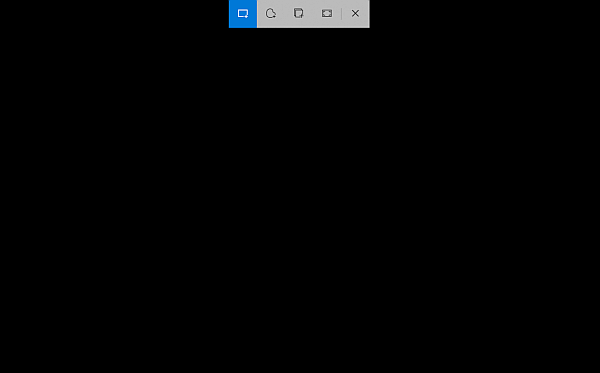
When you want to take a snapshot , press the Windows logo key + Shift + S to start "Snip & Sketch" in capture mode.
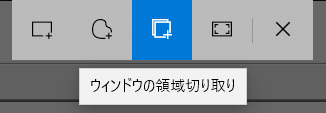
An icon is displayed at the top of the desktop, and you can use four cutting modes.
Move the cursor over the icon and a description will pop up.
From the left
- Cut a rectangular area
- Freeform area clipping
- Cut window area
- Full-screen display area clipping
- close
Snapshot when the cursor is placed on "C. Cut window area"
[Screen immediately after executing Windows logo key + Shift + S]
Summary
If you're using Windows 10 v1809 or later, you can use both Snipping Tool and "Crop & Sketch".
When you start the Snipping Tool, a button that guides you to "Snip & Sketch" is added.
That means
Snipping Tool may be removed from Windows 10 in the near future.
Used together with IrfanView
It is convenient to use IrfanView and "Snip & Sketch" together.
IrfanView has a screen capture function, and keyboard shortcuts are also available. Then the user can change it to their preferred key.
You can take a screen capture every time you press the keyboard shortcut Ctrl + F11 .
Set the capture mode of IrfanView to "Active Window" and call "Snip & Sketch" from the keyboard when you need to cut the area.
WinShot is attractive because it allows you to perform capture operations from the notification area icon, but I refrain from using it because it has an old design and is incompatible with Windows 10, but if you set it properly, it will work comfortably on Windows 10.
Please read the related article for the adjustment method when using WinShot on Windows 10.
Find out how to use the screen capture function of IrfanView from the article of IrfanView.
このサイトを検索 | Search this site


![en[Event ID 10016] How to fix PerAppRuntimeBroker error](https://blogger.googleusercontent.com/img/b/R29vZ2xl/AVvXsEjaZik97wjiIY5AhG5wgWpb6QknqoQYH8QEqj92XWmtDVerqvarbEA_8rKr1_tHFjNwXTLwITIw6vspCYSoZirr7xS7MKzgWJGLLWDgBGW_xIr-ymWJ9J4ewRzbTmn163jrpG4J-l3wtvj0/w680/execti-comexp.msc.png)


![[KB4586853] 日本語IMEの不具合を改善 (2020年11月30日)](https://blogger.googleusercontent.com/img/b/R29vZ2xl/AVvXsEg_mrn_nCCLy8LvSwsXRVy6ryy4e8GkayMHx0VN_19Ph5g2ZMl2BDQPE22NJHBZ0BJ0w1ULyOCE-k_ygrS3gQxN0TMBo54uYa5lvxxRel8-jC8T0XADAPhcajiSE7bjMwmSFbFoIUDfjPCV/w680/wuYellow.png)